 Express Tracked UK Delivery On 1000s of Items
 90 Day Returns
How To Charge A Golf Trolley Battery Safely And Correctly
R YYour electric golf trolley battery died halfway through your round, or maybe you just got home and you're staring at your charger wondering if you're doing this right. Plugging things in seems simple enough, but one wrong move can damage an expensive battery or even create a safety hazard. Lithium batteries especially need the right approach.
Charging your golf trolley battery correctly takes about five minutes of your time and keeps your investment running for years. The process follows a specific order and requires attention to a few key details. Once you know the steps, it becomes second nature.
This guide walks you through everything you need to charge your golf trolley battery safely and correctly. You'll learn what to check before you start, the exact connection sequence to follow, how to read your charger's indicator lights, and simple maintenance habits that extend battery life between rounds. Whether you own a PowaKaddy, GoKart, or any other electric trolley, these principles apply across all major brands and battery types.
What to know before you charge
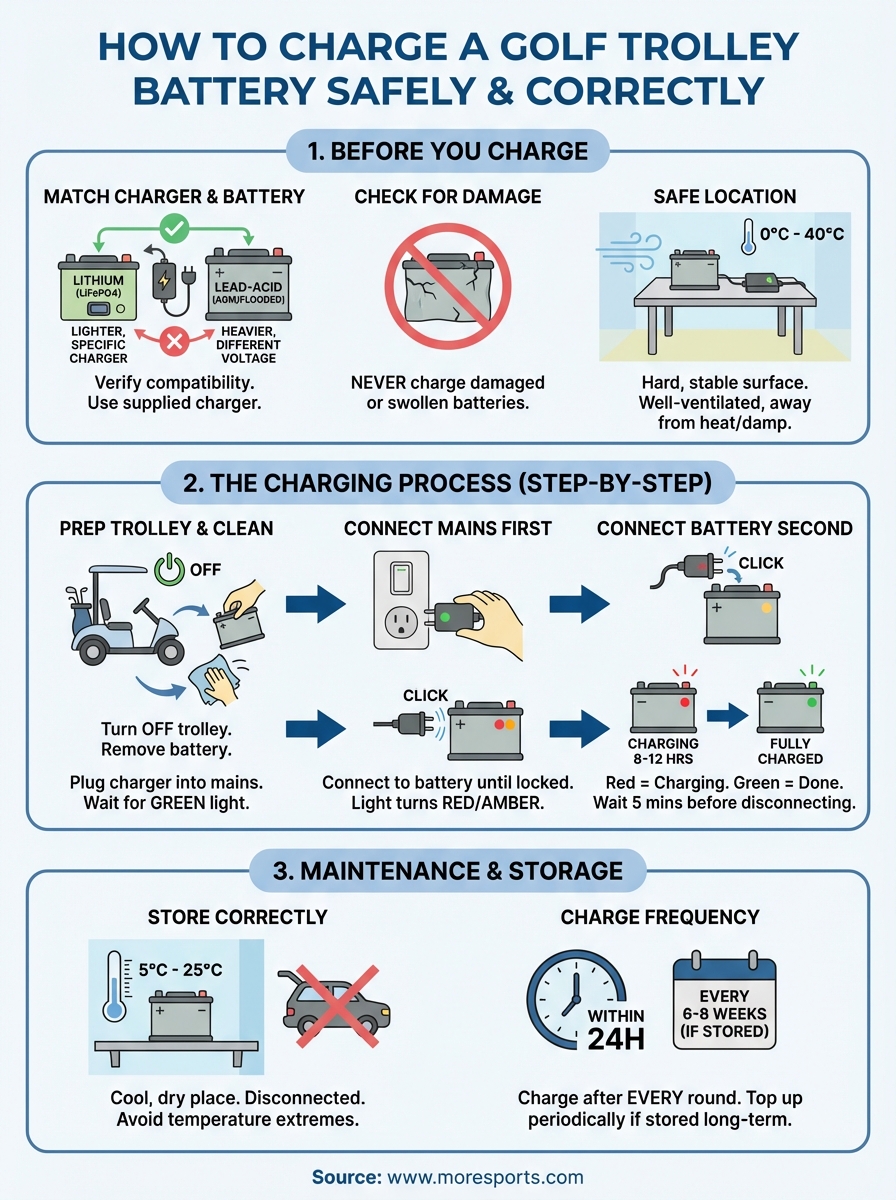
Knowing how to charge a golf trolley battery properly starts well before you plug anything in. Your charger must match your battery type, and using the wrong one can cause permanent damage or create a fire hazard. Lithium batteries require lithium-specific chargers, while lead-acid batteries need different voltage settings. Most manufacturers include the correct charger with your battery, but if you've replaced either component separately, you must verify compatibility before the first charge.
Check your battery type and charger match
You need to identify whether you own a lithium (LiFePO4) battery or a lead-acid battery (AGM or flooded). Lithium batteries typically have a button or switch on the casing and feel significantly lighter than lead-acid alternatives. Check your charger's label for its output voltage and battery chemistry specifications. PowaKaddy lithium chargers, for example, are programmed specifically for their battery voltage limits and will not work safely with lead-acid batteries.
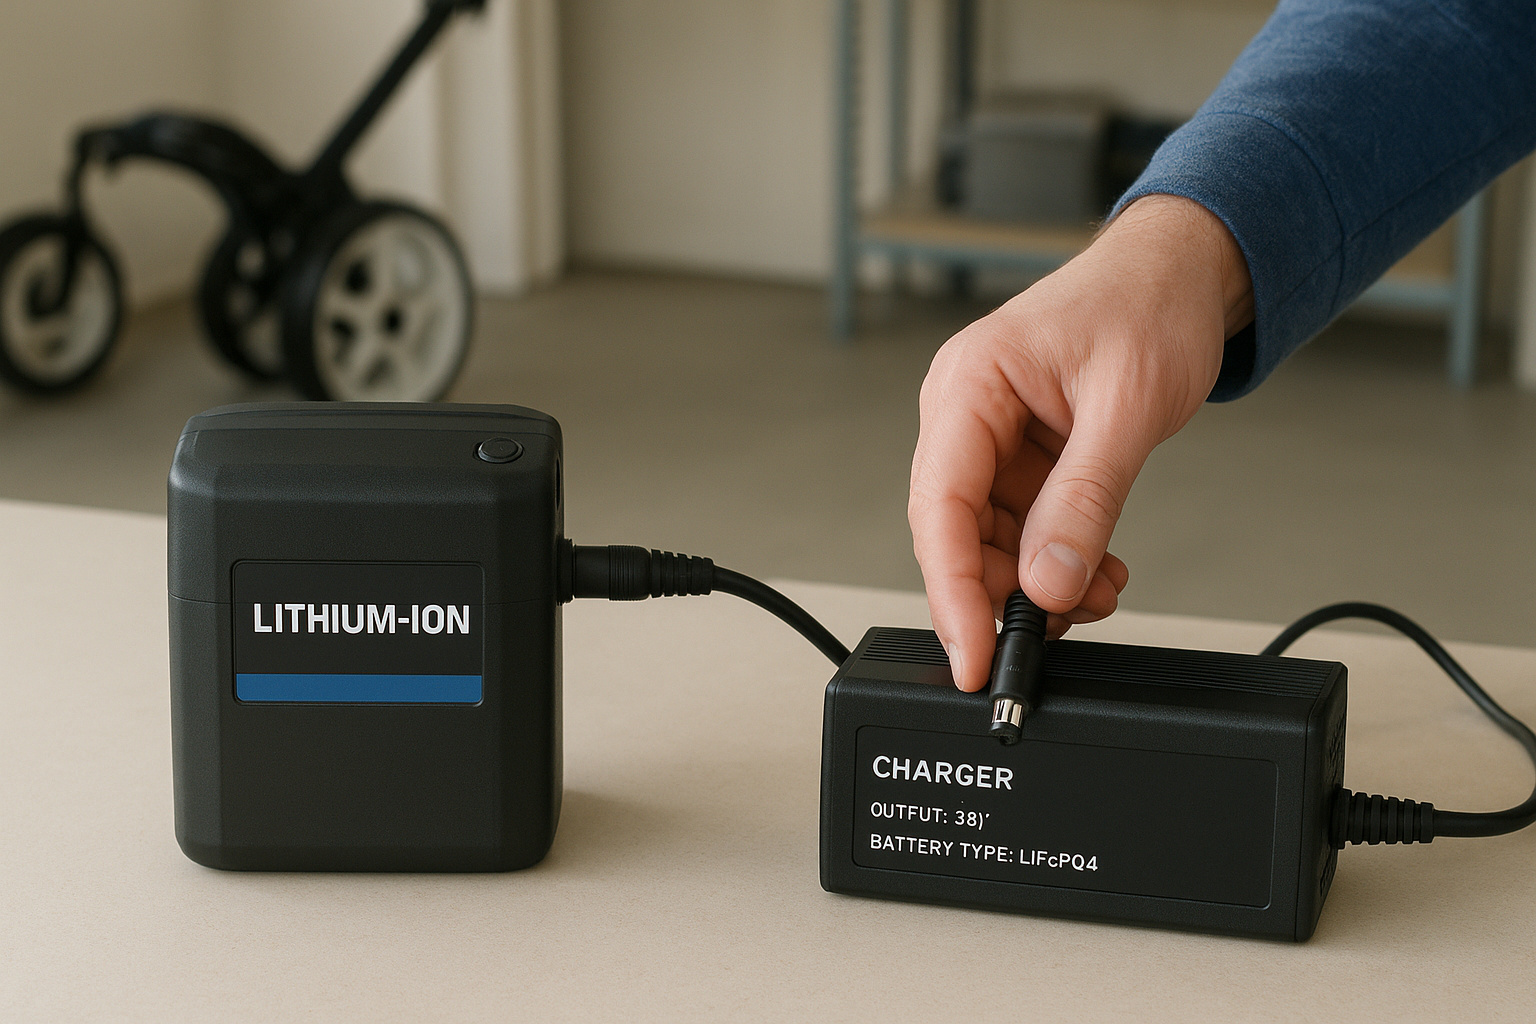
Always use the charger supplied by your battery manufacturer to avoid voltage mismatches and warranty issues.
Never attempt to charge a battery with visible damage, cracks, or swollen casing. If your battery shows any physical defects, contact your retailer immediately and do not charge it under any circumstances.
Pick the right charging location
Place your battery and charger on a hard, stable surface in a well-ventilated area away from direct sunlight or heat sources. Garages, utility rooms, and workshops work well, but avoid damp locations or anywhere near flammable materials. The charging area should maintain temperatures between 0°C and 40°C for optimal performance. Keep the setup away from children and pets, and ensure the space allows gases to disperse during charging, particularly important for lead-acid batteries which release hydrogen during the process.
Step 1. Get your trolley and battery ready
Preparing your trolley and battery before charging prevents connection problems and protects both components from damage. You want to start with a clean, stable setup that allows the charger to work efficiently. Taking two minutes to complete this step saves hours of troubleshooting later and extends the working life of your battery by preventing corrosion and poor connections.
Turn off your trolley completely
Switch off your trolley's power button and remove the battery from its housing before you begin. Most electric trolleys feature a simple on/off switch near the battery compartment or on the control panel. Press it firmly until any indicator lights go dark, then wait 30 seconds before disconnecting the battery. This cooling-off period allows the internal circuits to settle and prevents voltage spikes during disconnection.
Removing the battery from your trolley during charging reduces strain on the connectors and keeps your trolley ready for storage.
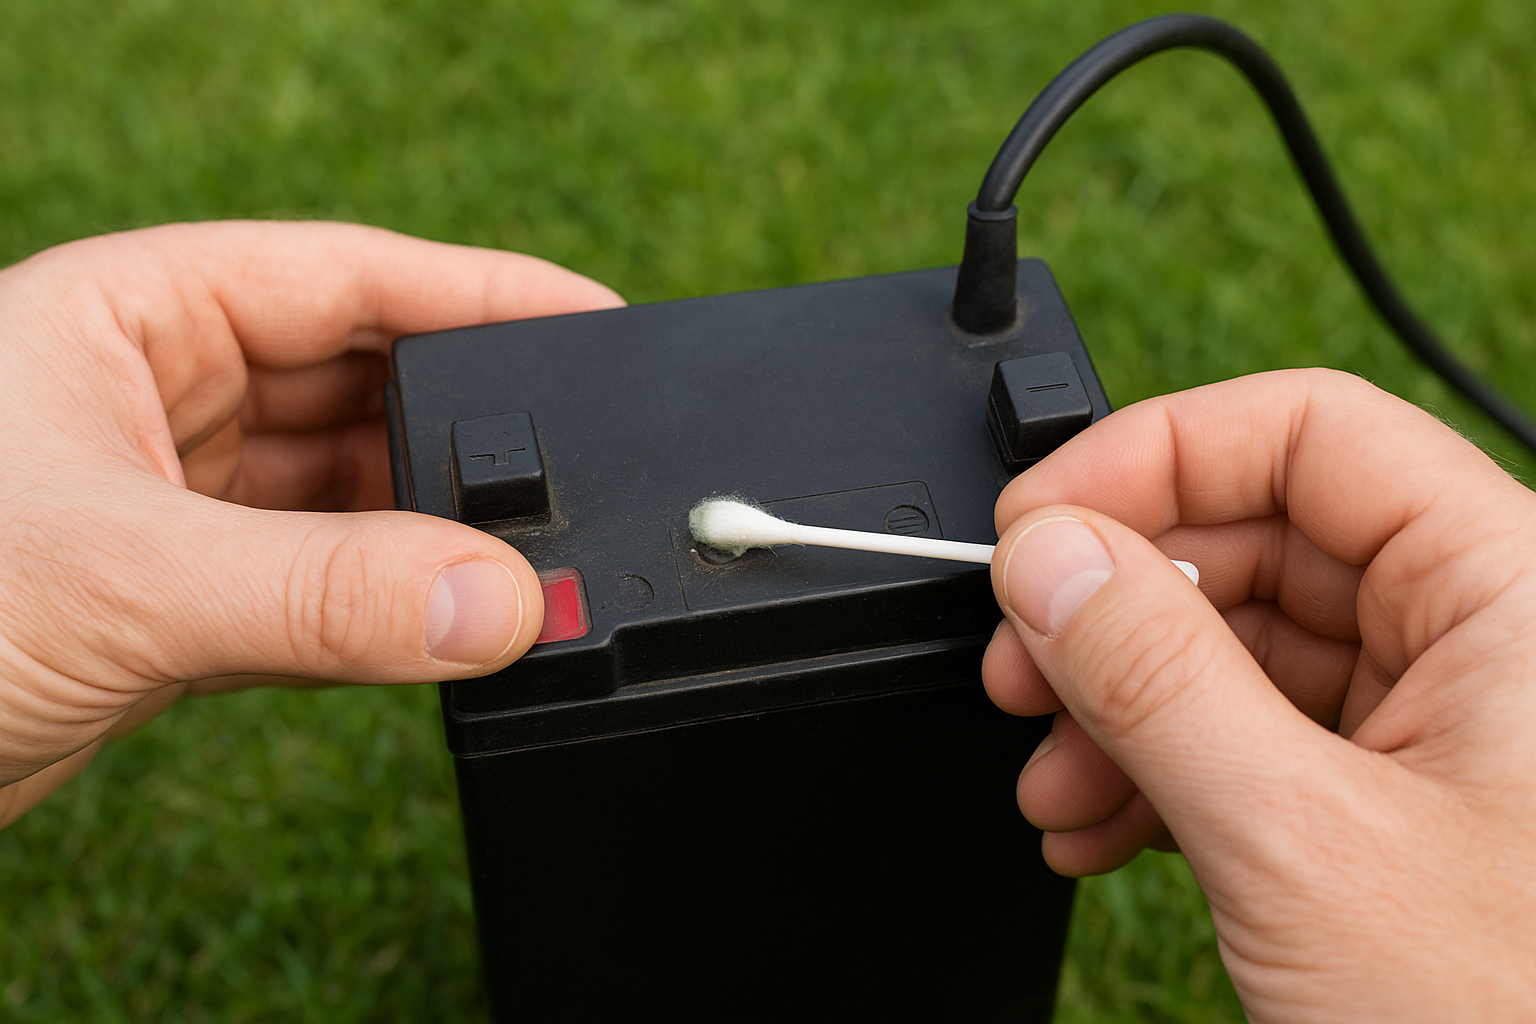
Clean battery terminals and connections
Inspect the battery terminals (the metal contact points) and connector plugs for dirt, grass clippings, or corrosion before charging. Use a dry cloth to wipe away loose debris, then examine the metal surfaces closely. If you spot green or white buildup (corrosion), gently clean it with a cotton bud dipped in warm water, then dry thoroughly. Check that rubber seals around connectors remain intact and show no signs of cracking or damage. Clean terminals ensure proper current flow when learning how to charge a golf trolley battery correctly, and they prevent the charger from throwing error codes mid-cycle.
Step 2. Connect the charger the right way
The connection sequence matters more than most people realise, and reversing the order can trigger safety features or damage your equipment. Your charging process succeeds or fails based on how you make these initial connections. Following the manufacturer's recommended sequence protects both your battery and charger from voltage spikes and connection errors that shorten their lifespan.
Follow the correct connection sequence
Most modern golf trolley chargers require a specific connection order that reduces electrical stress on the components. Start by plugging your charger into the mains socket and switching it on at the wall. The charger's indicator light will typically show green at this stage, signalling it has power and awaits a battery connection. Wait for this green light before proceeding to the next step.
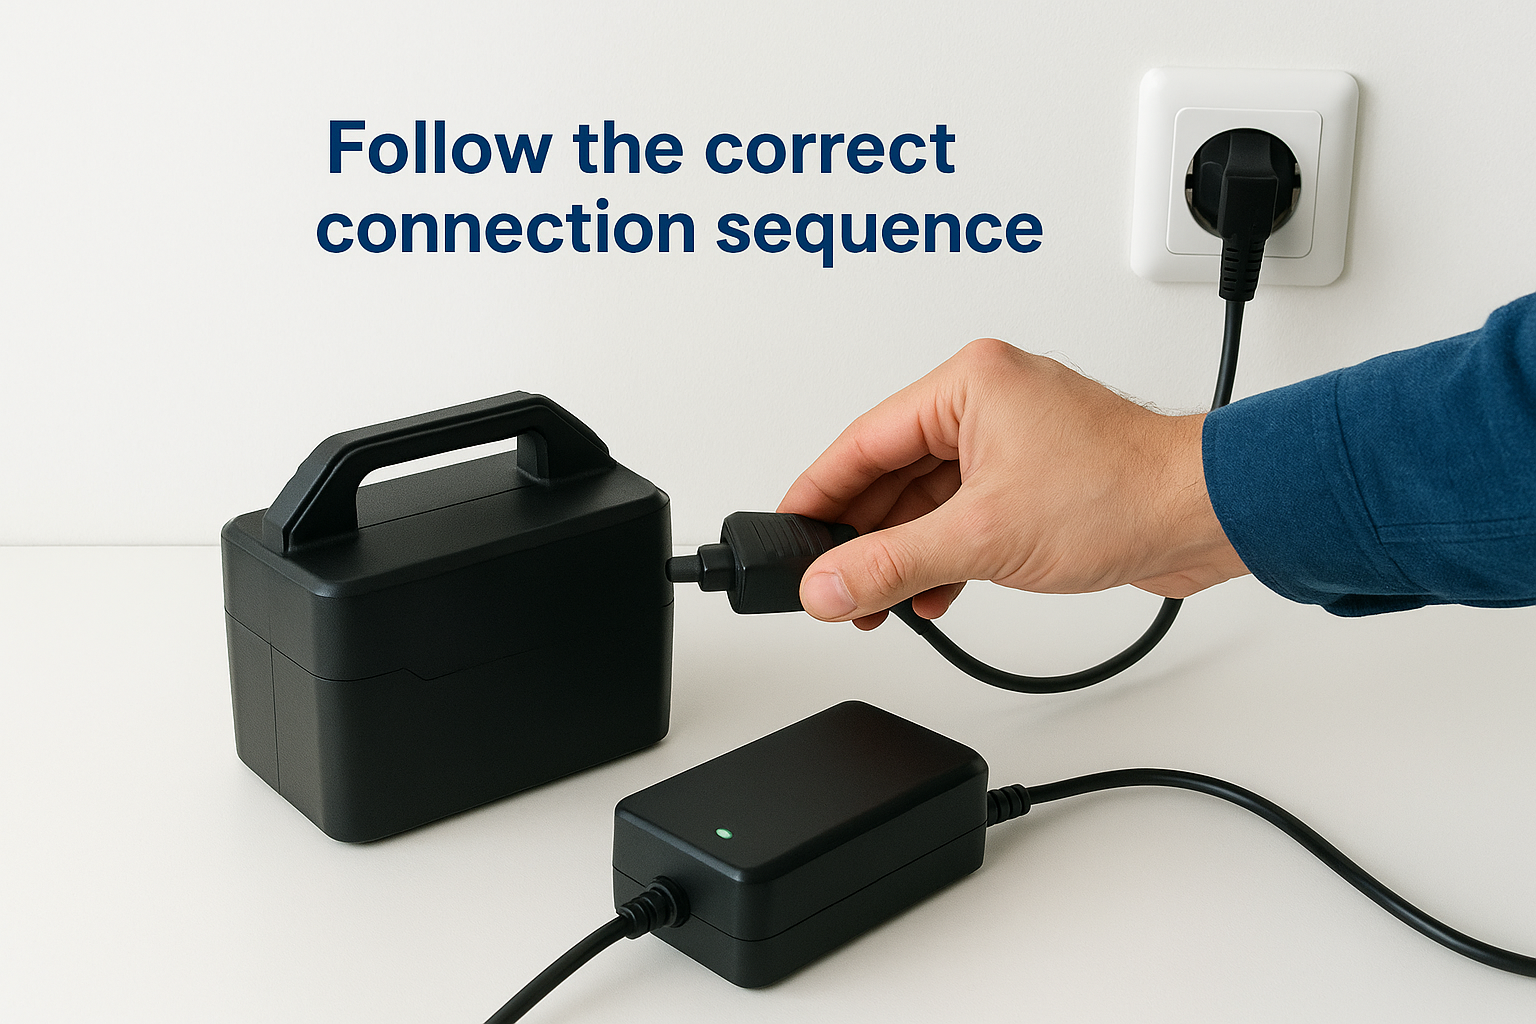
Next, connect the charger plug firmly into your battery's charging port until you hear or feel a definite click. The charger's indicator light should immediately change to red or amber, showing it recognises the battery and begins the charging cycle. If the light stays green after connection, you may have a faulty battery or incompatible charger. Understanding how to charge a golf trolley battery properly means respecting this sequence every single time, not just when you remember.
Connecting the charger to mains power first prevents voltage surges that can confuse the battery management system.
Verify your connections stay secure
Push the charger plug into the battery port until it locks, checking that no metal contacts remain visible around the connection point. A loose connection creates resistance, generates heat, and can stop the charging cycle mid-process. Your charger and battery should sit flat and stable on your chosen surface without cables pulling on the connections. Route the mains cable away from walking paths to prevent trips that could disconnect everything halfway through charging. Check both ends of your setup after five minutes to confirm nothing has shifted or worked loose during the initial charging phase.
Step 3. Monitor charging and know when it is done
Monitoring your battery during charging requires minimal effort but prevents overcharging and helps you spot problems early. Modern chargers handle the technical work automatically, but you still need to understand what the indicator lights mean and recognise when your battery has reached full charge. Checking your setup once or twice during the charging cycle takes seconds and gives you confidence that everything works correctly.
Read your charger's indicator lights
Your charger's indicator light tells you everything you need to know about the charging status. When you first connect the battery, the light changes from green to red (or amber on some models), confirming the charging cycle has started. This red light stays constant throughout most of the charging process, typically lasting 8 to 12 hours depending on your battery capacity and depth of discharge. Different charger brands use slightly different colour codes, but the principle remains consistent across manufacturers.
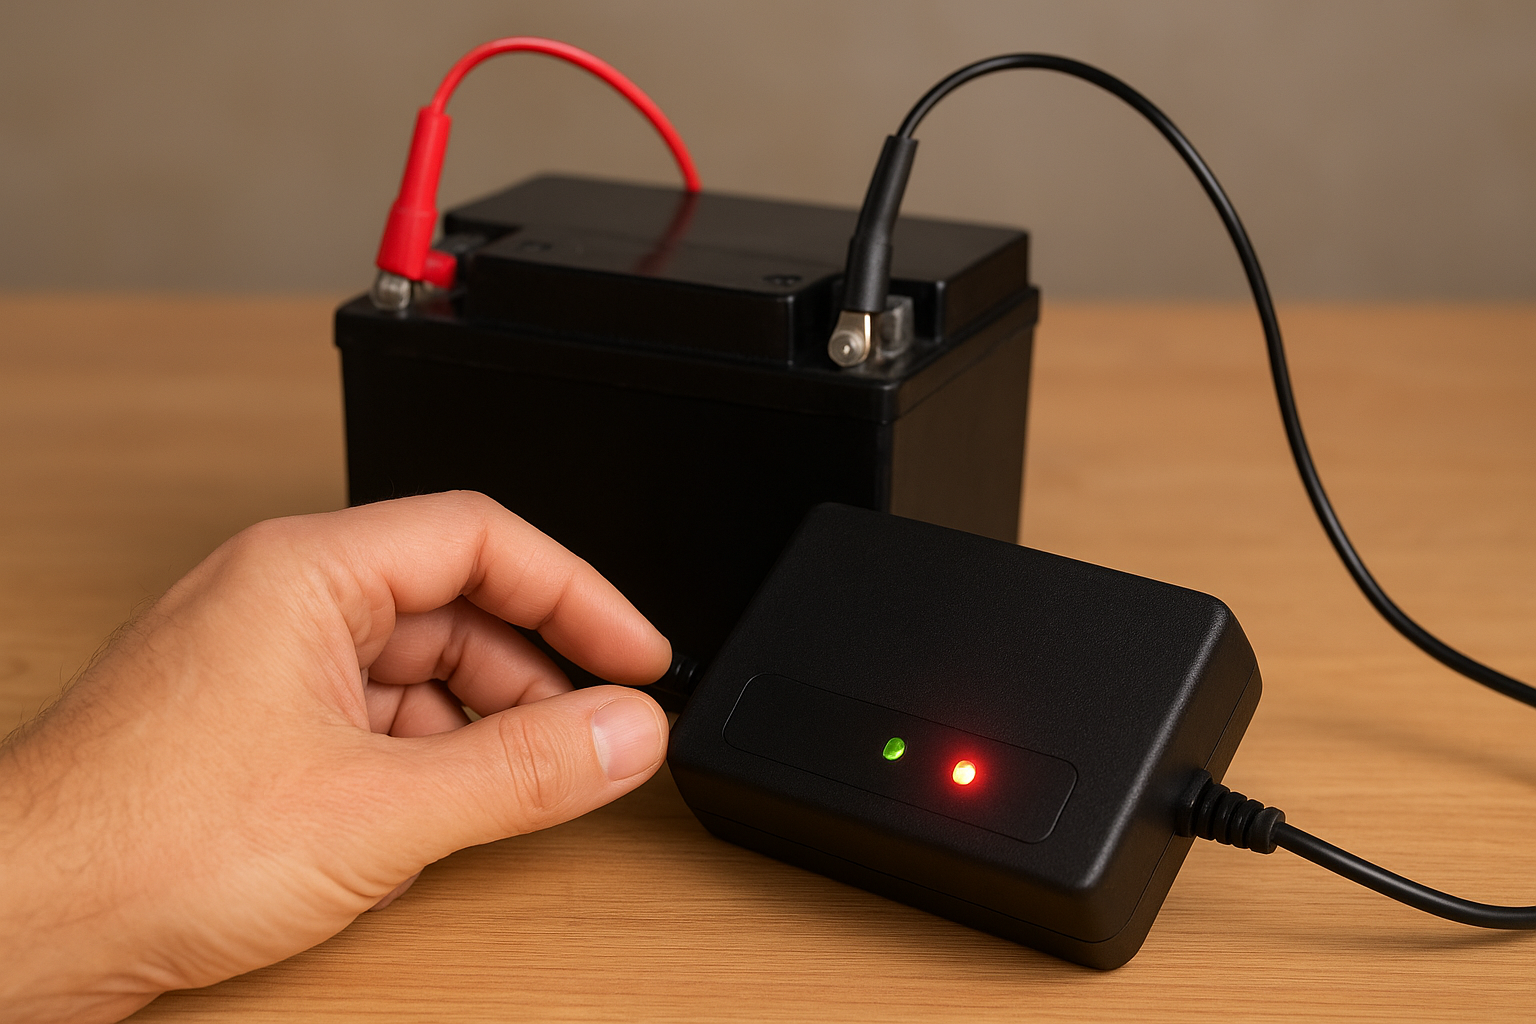
Some chargers feature dual LED systems that show both power status and charging progress simultaneously. If your charger displays flashing lights or unusual colour combinations, consult your manual immediately as this often indicates a connection fault or battery protection mode.
Recognise when charging completes
Your charger automatically stops when the battery reaches full capacity, and the indicator light switches back to solid green. This green light confirms your battery is ready for use and the charger has entered maintenance mode. Never disconnect the charger while the light remains red, as this interrupts the charging cycle and can leave your battery partially charged. Learning how to charge a golf trolley battery correctly means allowing the full cycle to complete every time, regardless of how many holes you played.
A fully charged lithium battery should read between 12.6V and 13V when tested with a multimeter several hours after charging completes.
Wait 5 minutes after the green light appears before disconnecting to ensure the battery management system has finished balancing all cells.
Step 4. Look after the battery between rounds
Proper battery maintenance between rounds extends its lifespan by several years and prevents the frustration of arriving at the course with insufficient charge. You need to follow specific storage and charging habits that keep your battery healthy even during periods of inactivity. Most battery failures stem from neglect rather than age, and adopting a few simple routines protects your investment.
Store your battery correctly
Keep your battery in a cool, dry location away from direct sunlight and extreme temperatures. Ideal storage temperatures range between 5°C and 25°C, with your garage, utility room, or shed typically providing suitable conditions. Never leave your battery in a car boot during summer or winter months, as temperature extremes accelerate capacity loss. Store the battery disconnected from your trolley to prevent phantom drain from the electronics, and place it on a shelf or hard surface rather than directly on concrete floors.
Charge at the right frequency
Charge your battery within 24 hours of every round, regardless of how many holes you completed. Leaving a battery in a partially discharged state causes capacity degradation, particularly in lead-acid models. Understanding how to charge a golf trolley battery properly includes knowing that lithium batteries handle partial charges better than lead-acid, but both types perform best when kept topped up. If you store your battery for more than four weeks without use, recharge it every 6 to 8 weeks to maintain cell balance and prevent deep discharge.
Lithium batteries left unused for extended periods should be stored at approximately 50% charge rather than fully charged to maximise long-term health.
Keep your trolley ready for every round
Following these charging steps keeps your battery healthy and your trolley reliable throughout the season. Learning how to charge a golf trolley battery correctly takes minimal effort once you establish the routine: check compatibility, connect in the right order, wait for the green light, and maintain regular charging habits. Your battery will reward this attention with consistent performance and extended lifespan.
Most charging problems stem from rushing the process or ignoring basic maintenance between rounds. Taking five minutes to charge properly after each game prevents expensive battery replacements and ensures you never face power loss mid-round. Your equipment represents a significant investment, and proper charging protects that investment for years to come.
Browse our complete range of golf trolleys and accessories to find replacement batteries and the latest electric trolley models that match your needs.